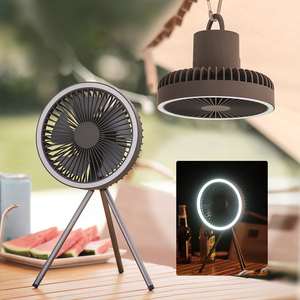
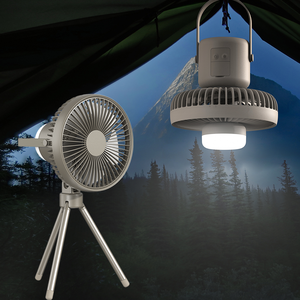
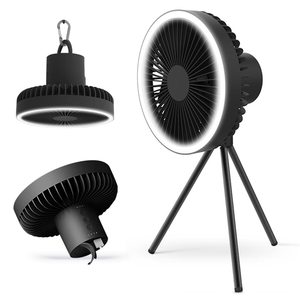
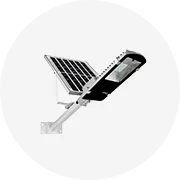
Types of Light Disassembler
A light disassembler is an electronic device that allows users to see the source code of a program. It is used to analyze and understand programs, especially in software development and security analysis. Light disassemblers can be used to recover lost source code, analyze malware behavior, or study how software works. There are several types of light disassemblers, each with its own features and uses.
-
Integrated Development Environment (IDE) Disassemblers
Some IDEs have built-in disassemblers or can be extended with plugins that offer disassembly features. These IDE disassemblers allow developers to analyze compiled code within the context of their development environment.
-
Command-Line Disassemblers
Command-line tools are often preferred by advanced users and developers who work in a command-line environment. These disassemblers offer powerful features and can be scripted or automated for batch processing of binaries.
-
Online Disassemblers
Web-based services that accept binary files and provide disassembly in a browser. Online disassemblers are convenient for quick analysis without installing software but may have limitations in handling large binaries or sensitive data.
-
Architecture-Specific Disassemblers
Some disassemblers are designed for specific CPU architectures, such as x86, ARM, MIPS, or PowerPC. These architecture-specific tools optimize the disassembly process for the unique instruction set and features of the targeted architecture.
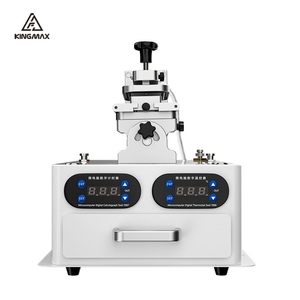
Specification & Maintenance of Light Disassembler
-
Daily Maintenance
1. Before using a light disassembler, check whether the power cord and plug are damaged. If so, stop using it immediately and replace or repair it. If the power cord is found to be damaged during use, it should be stopped immediately, and the maintenance personnel should be notified to avoid accidents.
2. Before using a light disassembler, check whether the power cord and plug are damaged. If so, stop using it immediately and replace or repair it. If the power cord is found to be damaged during use, it should be stopped immediately, and the maintenance personnel should be notified to avoid accidents.
3. Before using a light disassembler, check whether the power cord and plug are damaged. If so, stop using it immediately and replace or repair it. If the power cord is found to be damaged during use, it should be stopped immediately, and the maintenance personnel should be notified to avoid accidents.
-
Weekly Maintenance
1. Weekly check the entire body and workbench of the light disassembler for dirt and dust, and clean it in time. At the same time, check whether there are sundries and dirt in the workbench light hole and the air outlet hole of the light disassembler and clean it up in time.
2. Check the working light holes, air outlet holes, etc., of the light disassembler weekly to see whether there are sundries and dust. If there are sundries and dust, clean them in time to avoid affecting the equipment's use function.
-
Monthly Maintenance
1. The light disassembler should be maintained and repaired every month according to the disassembler's requirements. Maintenance personnel should strictly follow the instructions of the light disassembler manufacturers to check and maintain the equipment, ensuring the equipment's normal operation and extending its service life.
2. Light disassemblers are precision instruments. Monthly professional maintenance can ensure their accuracy and stability. Therefore, light disassemblers should be maintained and repaired every month according to the requirements of the disassembler.
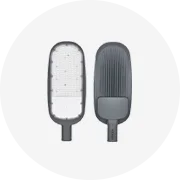
How to Choose Light Disassembler
Choosing a suitable light disassembler requires consideration of several important factors to ensure that the tool meets specific needs and requirements. Here are some key factors to consider:
-
Type of Lights to be Disassembled
Before choosing a disassembler, it is important to determine the type of LED lights that need to be disassembled. Different LED lights have different designs and structures, which may require specific tools or techniques for disassembly. For example, if LED lights have soldered components, a soldering iron-based disassembler might be necessary. On the other hand, if the components are glued, a prying and scraping tool would be more appropriate.
-
Quality and Durability
When selecting a light disassembler, it is important to consider its quality and durability. A high-quality tool will ensure reliable performance and durability, so it can be used for a long time without damage or wear. Additionally, a durable tool will be able to withstand the pressure and force required to disassemble LED lights without breaking or losing its effectiveness.
-
Ergonomics and Comfort
Another important factor to consider when choosing a light disassembler is its ergonomics and comfort. Tools with ergonomic designs, such as comfortable handles and appropriate sizes, will make the disassembly process easier and reduce the risk of fatigue or injury. Additionally, a comfortable tool to hold and use will improve efficiency and accuracy in disassembling LED lights.
-
Safety
Safety is an important aspect to consider when choosing a light disassembler. Make sure the tool has safety features, such as insulated handles to prevent electric shock or sharp edges that can cause cuts. Additionally, consider tools that are made from safe materials and do not contain harmful substances.
-
Price
Price is also a factor that needs to be considered when choosing a light disassembler. Determine the budget that is available for purchasing tools and compare the prices of different options. However, do not only focus on the low-priced tools, but also consider the quality and performance of the disassembler. Sometimes, a slightly higher-priced tool can provide better quality and durability compared to a cheap tool but with quick damage.
-
Brand and Recommendation
Choosing a disassembler from reputable brands and widely recommended by users can be a wise choice. Look for reviews and recommendations from other users who have used the tool before. This will help ensure that the disassembler chosen has good quality and reliable performance.
In summary, when choosing a light disassembler, consider the type of LED lights to be disassembled, the quality and durability of the tool, its ergonomics and comfort, safety aspects, price, and brand recommendations. By paying attention to these factors, an appropriate light disassembler can be chosen to meet the needs and ensure effectiveness in disassembling LED lights.
How to DIY and Replace Light Disassembler
Light disassembly is an easy process. It is worth noting that the light disassembly method varies depending on the type of light. Below are the steps for DIY and replace.
-
Tools Needed
Before one starts, ensure that the following tools are at hand:
1. Screwdrivers (flat-head and Phillips)
2. Pliers
3. Safety glasses
4. Sharp knife or utility knife
5. Heat gun or hairdryer
-
Step by Step Guide
1. Safety First: Always wear safety glasses before starting to protect the eyes from any flying debris or broken glass. Choose a surface that is safe to work on and will not be damaged in case of glass or light falling.
2. Identify the Type of Light: Different lights have different structures. Know the type of light, whether it is a screw, clip, or glue-based joint, and find out how to disassemble it.
3. Remove from Fixture: Carefully remove the light from its fixture or holder. Be cautious and avoid using much force, as this can damage the light or the surrounding parts.
4. Take Out the Bulbs: If the bulbs are individual and not connected to the rest of the light by wires, gently take them out. If they are connected by wires, leave them in place for now.
5. Open the Glass or Cover: Glass and covers held with screws should be unscrewed and set aside. If they are glued or clipped, use a flat-head screwdriver or pliers carefully to avoid breaking them and take them out.
6. Remove the Gasket: The gasket is a rubbery or foam-like strip often placed around the edges where the glass or cover meets the light's body. It can usually be easily pulled off with fingers or a flat-head screwdriver.
7. Unscrew the Circuit Board: If screws hold the circuit board, unscrew them using a screwdriver and gently take the circuit board out. If it is held in place by clips, use a flat-head screwdriver or pliers carefully to avoid breaking them and take the circuit board out.
8. Take Out the Old LED Chips: The old LED chips can be gently pried off the circuit board using a flat-head screwdriver or pliers. Be careful not to damage the circuit board while doing this.
9. Install New LED Chips: Align the new LED chips with the pads or holes on the circuit board where the old ones were located. Press them down firmly to ensure a good connection.
10. Reassemble the Light: Put the circuit board back into the light body and secure it with screws or clips. Reattach the gasket, glass or cover, and bulbs if removed earlier. Ensure everything is tightened and secured properly to prevent any loose parts.
11. Test the Light: Before reinstalling it into its fixture, plug the light into an electrical outlet or connect it to a power source to ensure it functions correctly. If it does not light up, double-check the connections and reassemble to ensure everything is in place.
12. Final Installation: Once the light disassembler is working correctly, carefully put it back into its fixture or holder and turn the power on to test again.
Q&A
Q1: Can one use a light disassembler on any type of adhesive?
A1: While light disassemblers are effective on many adhesives, particularly those used in automotive and electronic applications, they may not be suitable for all types. Some adhesives, like certain strong construction adhesives, are designed to be heat and solvent-resistant. If exposed to a light disassembler, they will not come off easily.
Q2: Is a light disassembler safe for use on plastic and painted surfaces?
A2: Light disassemblers are generally safe for use on various surfaces, including plastics and painted surfaces. However, it is crucial to test them on a small, inconspicuous area first. This is because there may be different types of disassemblers with varying compositions, and some might damage or discolor certain plastics or paints.
Q3: How does a light disassembler work?
A3: A light disassembler works by weakening the bond formed by the adhesive to allow easy removal of parts without damaging them. It does this through its chemical composition, which can be a mixture of solvents or other compounds.
Q4: Is a light disassembler flammable?
A4: Some light disassemblers can be flammable because they contain solvents like alcohol or acetone, which are combustible. Therefore, they should be used away from open flames and in well-ventilated areas to minimize the risk of fire.


 浙公网安备 33010002000092号
 浙B2-20120091-4