


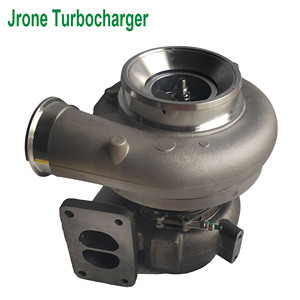


Types of Jrone Turbocharger
Jrone turbochargers are engineered for various applications based on engine specifications and performance goals. Understanding the different types will help you select the optimal turbocharger for your specific needs.
Single Turbocharger
The most common configuration featuring one turbocharger unit. Single turbochargers are widely used in smaller vehicles with simple engine designs.
Key benefits: Simplicity, cost-effectiveness, ease of installation and maintenance.
Best for: Everyday drivers, entry-level performance upgrades, compact engines.
Twin Turbocharger
Utilizes two turbochargers working in tandem to compress air and boost engine power output. This setup delivers significantly higher performance capabilities.
Key benefits: Enhanced power delivery, improved torque across the entire RPM range, reduced turbo lag.
Best for: Sports cars, high-performance vehicles, larger engines requiring substantial boost.
Variable Geometry Turbocharger
Features adjustable vanes that optimize airflow through the turbine at different engine speeds, providing consistent performance throughout the power band.
Key benefits: Reduced turbo lag, improved low-end torque, enhanced overall efficiency.
Best for: Diesel engines, vehicles requiring balanced torque at low RPM.
Electric Turbocharger
Cutting-edge technology that uses electric motors to spin the turbine, eliminating traditional turbo lag and providing instant boost.
Key benefits: Instant response, improved efficiency, minimized lag.
Best for: Premium vehicles, hybrid powertrains, applications where immediate response is critical.
Wastegate Turbocharger
Incorporates a wastegate valve to regulate boost pressure by controlling exhaust gas flow through the turbine wheel.
Key benefits: Precise boost control, protects engine from over-boosting, optimizes performance.
Best for: High-performance applications, modified engines, racing vehicles.
Expert Insight: When selecting between turbocharger types, consider not only current performance needs but also future upgrades. The right Jrone turbocharger should accommodate your long-term performance goals while working within your engine's specifications.
| Turbocharger Type | Ideal Application | Performance Characteristics | Installation Complexity |
|---|---|---|---|
| Single Turbocharger | Daily drivers, small engines | Balanced power increase, moderate response | Low to Moderate |
| Twin Turbocharger | Sports cars, larger engines | Significant power gains, better response | High |
| Variable Geometry | Diesel engines, all-purpose vehicles | Excellent low-end torque, reduced lag | Moderate to High |
| Electric Turbocharger | Premium vehicles, hybrids | Instant response, minimal lag | Very High |
| Wastegate Turbocharger | Performance builds, racing | Precision boost control, high output | Moderate |
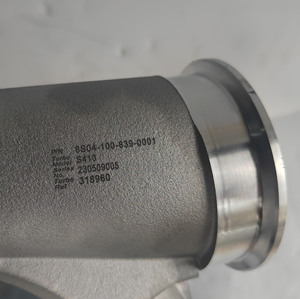
Specifications of Jrone Turbochargers
Understanding the technical specifications of Jrone turbochargers is crucial for selecting the right model and ensuring optimal performance for your specific application.
Air Flow Capacity
Jrone turbochargers offer airflow ratings between 350-1500 CFM (Cubic Feet per Minute), varying by model and design. This specification determines the volume of air the turbocharger can deliver to the engine.
Impact: Higher CFM ratings support greater horsepower potential but require appropriate engine modifications to utilize effectively.
Boost Pressure Range
Typical boost pressure for Jrone turbochargers ranges from 6-30 PSI (Pounds per Square Inch), depending on the specific model and application.
Impact: Higher boost pressure correlates with increased engine power, but must be balanced with engine internals' capabilities to prevent damage.
Compressor Wheel Diameter
Jrone compressor wheels range from 45-80 millimeters in diameter, with larger wheels capable of moving more air at higher boost levels.
Impact: Larger compressor wheels provide greater top-end power but may produce more lag at lower RPMs.
Turbine Wheel Diameter
Turbine wheel diameters typically range from 50-90 millimeters, determining how efficiently the turbocharger can utilize exhaust gases.
Impact: Smaller turbines spool faster but may restrict top-end power; larger turbines offer higher power potential but with increased lag.
Cooling Method
Jrone turbochargers employ either water cooling or oil cooling systems to manage operating temperatures.
Impact: Water-cooled units generally offer better temperature management for high-performance applications but require more complex installation.
Construction Materials
Manufactured using high-strength aluminum alloys, stainless steel, and other specialized materials designed for durability under extreme conditions.
Impact: Material quality directly affects turbocharger longevity, heat resistance, and performance stability.
Important Note: Always verify that your engine's internal components can safely handle the increased pressure and heat that come with turbocharging. Upgrading supporting systems (fuel delivery, cooling, engine management) is often necessary when installing performance turbochargers.
Maintenance of Jrone Turbochargers
Proper maintenance is essential for maximizing the lifespan and performance of your Jrone turbocharger. Following these maintenance practices will help prevent premature failure and ensure consistent performance.
Regular Oil Changes
The lifeblood of your turbocharger system is clean, high-quality oil. Turbochargers operate at extremely high temperatures and speeds (up to 250,000 RPM), making proper lubrication critical.
- Change oil every 3,000-5,000 miles or as recommended by the manufacturer
- Use synthetic oil for better high-temperature stability
- Monitor oil pressure and quality regularly
Using the Right Oil
Oil viscosity and quality significantly impact turbocharger performance and longevity.
- Use manufacturer-recommended viscosity (typically 5W-30 or 5W-40 for most applications)
- Select high-quality synthetic oils with good thermal stability
- Consider oils specifically formulated for turbocharged engines
Regular Inspections
Periodic visual inspections can catch potential issues before they lead to catastrophic failure.
- Check for oil leaks around turbo housing and oil lines
- Inspect for cracks or damage to the compressor and turbine housings
- Verify actuator movement and function (for variable geometry turbos)
- Check for excessive shaft play, which may indicate bearing wear
Clean Air and Oil Filters
Contamination is a primary cause of turbocharger failure, making filter maintenance crucial.
- Replace air filters every 15,000-30,000 miles or more frequently in dusty conditions
- Ensure all intake connections are secure and free from leaks
- Inspect oil filters during every oil change
Proper Warm-Up and Cool-Down
Heat cycling plays a critical role in turbocharger longevity.
- Allow 30-60 seconds of idle time before driving, especially in cold weather
- After high-speed or heavy-load driving, idle for 1-2 minutes before shutdown
- Avoid immediate high-RPM operation when starting a cold engine
Avoid Excessive Revving
High engine speeds, especially without proper warm-up, can damage turbocharger components.
- Limit high-RPM operation until engine reaches normal operating temperature
- Avoid unnecessary high-boost situations in daily driving
- Consider installing boost and oil pressure gauges to monitor system health
Professional Advice: Consider a complete turbocharger inspection every 50,000 miles. This preventive measure can identify worn bearings, shaft play, or housing damage before it leads to complete turbocharger failure, potentially saving thousands in repair costs.
How to Choose the Right Jrone Turbocharger
Selecting the optimal Jrone turbocharger for your vehicle requires careful consideration of several factors to ensure performance goals are met without compromising reliability.
Engine Displacement Considerations
The size of your engine is a critical factor in turbocharger selection:
- Smaller engines (under 2.0L): Typically require smaller turbochargers with quicker spool-up times
- Medium engines (2.0-3.5L): Benefit from mid-sized turbos balancing response and top-end power
- Larger engines (3.5L+): Can effectively utilize larger turbochargers with higher flow capacity
Key principle: Match turbo size proportionally to engine displacement for optimal performance.
Driving Style Analysis
Your typical driving patterns should heavily influence turbocharger selection:
- City/Daily driving: Smaller turbos with quick spool-up for better low-end response
- Highway cruising: Medium to larger turbos that deliver efficient high-speed performance
- Performance/Track: Larger turbos optimized for maximum top-end power
Key principle: Align turbocharger characteristics with your most common driving scenarios.
Performance Goals
Define your performance objectives before selecting a turbocharger:
- Modest power increase: Small to medium turbo with conservative boost levels
- Balanced performance: Variable geometry or twin-scroll designs
- Maximum power: Larger turbochargers with appropriate supporting modifications
Key principle: Be realistic about your goals and ensure your entire powertrain can support them.
Budget Constraints
Financial considerations include both initial and long-term costs:
- Entry-level: Single turbo setups with minimal supporting modifications
- Mid-range: Higher quality single turbos or twin setups with moderate supporting upgrades
- Premium: Advanced variable geometry or electric turbochargers with comprehensive system upgrades
Key principle: Include supporting modifications in your budget planning (intercooler, engine management, fuel system).
| Performance Goal | Recommended Turbo Type | Supporting Modifications | Expected Cost Range |
|---|---|---|---|
| Daily Driver Upgrade (+20-30% power) |
Small Single Turbo | Basic intake, exhaust, tune | $1,500-$3,000 |
| Street Performance (+40-60% power) |
Medium Single or Twin | Intercooler, fuel upgrades, tuning | $3,000-$6,000 |
| Track/Competition (+70-100%+ power) |
Large Single or Twin | Comprehensive system upgrades, built engine | $6,000-$15,000+ |
Important Consideration: Always factor in the cost of supporting modifications when budgeting for a turbocharger upgrade. A high-performance turbo without appropriate fueling, cooling, and engine management can lead to poor performance or catastrophic engine failure.
DIY Jrone Turbocharger Installation Guide
Installing a Jrone turbocharger can be a rewarding DIY project for those with mechanical experience. This step-by-step guide outlines the process while highlighting important safety considerations.
Safety Warning: Turbocharger installation involves working with hot components, pressurized systems, and critical engine parts. If you're unsure about any step, consult a professional mechanic. Improper installation can lead to engine damage or personal injury.
Preparation Phase
Gather Essential Tools and Equipment
- Complete socket set (metric and standard)
- Various wrenches, pliers, and screwdrivers
- Torque wrench for precise bolt tightening
- Gasket scraper and clean rags
- New gaskets and seals (specific to your application)
- Oil catch pan and fresh engine oil
- Service manual for your specific vehicle model
Safety Preparations
- Disconnect battery negative terminal and wait 10+ minutes
- Allow engine to cool completely (minimum 30 minutes after operation)
- Work in a well-ventilated area with proper lighting
- Use safety glasses and gloves throughout the process
- Have a fire extinguisher nearby as a precaution
Removal Process
Remove Engine Covers and Accessories
Carefully remove any engine covers, shields, or components blocking access to the turbocharger. Document and label all parts and connections for easier reassembly.
Disconnect Intake and Exhaust Connections
Remove the air intake ducting, intercooler piping, and exhaust connections from the turbocharger. Inspect these components for wear or damage while they're accessible.
Disconnect Oil and Coolant Lines
Prepare for fluid drainage by positioning catch pans, then carefully disconnect and plug oil feed and return lines. For water-cooled turbos, disconnect and secure coolant lines.
Remove Turbocharger Mounting Hardware
Loosen and remove the bolts securing the turbocharger to the exhaust manifold and downpipe. Note the torque specifications for reinstallation.
Extract the Turbocharger
Carefully remove the turbocharger unit, noting orientation and position. Inspect mounting surfaces for damage or carbon buildup that should be addressed.
Installation Process
Clean Mounting Surfaces
Thoroughly clean all mounting surfaces using a gasket scraper and appropriate cleaner. Ensure all old gasket material is completely removed for proper sealing.
Install New Turbocharger
Position the new Jrone turbocharger with new gaskets and secure it to the manifold and downpipe using the manufacturer's specified torque sequence and values.
Connect Oil and Coolant Lines
Attach oil feed and return lines using new crush washers or gaskets. For water-cooled units, connect coolant lines according to the manufacturer's specifications.
Reconnect Intake and Exhaust Components
Reinstall all intake and exhaust connections, ensuring proper alignment and tight seals at all junction points.
Reinstall Accessories and Engine Covers
Replace all components removed during disassembly, following your documentation for proper positioning and connections.
Post-Installation Procedures
Refill Fluids
Add fresh engine oil according to manufacturer specifications. For water-cooled turbos, check and top off coolant levels.
Pre-Start Checks
- Reconnect battery
- Verify all connections are secure
- Check for any tools left in the engine bay
- Ensure all electrical connections are properly seated
Initial Startup Procedure
Start the engine without revving and let it idle for 2-3 minutes while checking for leaks or unusual noises. This crucial step allows oil to reach the turbocharger bearings before load is applied.
Break-In Period
For the first 500 miles, avoid high boost, high RPM, and heavy load situations. This break-in period allows components to properly seat and establishes proper lubrication pathways.
DIY Success Tip: Before starting any turbocharger installation, photograph each step of the disassembly process from multiple angles. These reference images can be invaluable during reassembly, especially for complex connections and routing of hoses and wiring.
Frequently Asked Questions
Q1: Can a Jrone turbocharger be fitted to any car?
While technically a turbocharger can be adapted to most vehicles, the practicality and complexity vary significantly. Modern vehicles with electronic engine management systems require comprehensive tuning and additional modifications to properly integrate a turbocharger. Key considerations include:
- Engine strength: Stock internal components may not withstand increased pressure and heat
- Fuel system capacity: Turbocharged engines require additional fuel delivery capabilities
- Electronic compatibility: Engine management systems must be modified to accommodate the turbocharger
- Space constraints: Some engine bays lack sufficient room for turbocharger installation
Always consult with a qualified mechanic or performance specialist before undertaking a turbocharger installation, particularly on non-turbocharged factory vehicles.
Q2: Can a Jrone turbo be upgraded without tuning the ECU?
Installing or upgrading a turbocharger without proper ECU (Engine Control Unit) tuning is strongly discouraged for several critical reasons:
- Air-fuel ratio: Without tuning, the engine will likely run too lean, potentially causing catastrophic engine damage
- Ignition timing: Turbocharged engines require specific timing adjustments to prevent detonation
- Boost control: Without proper management, boost pressure may exceed safe limits for engine components
- Sensor calibration: Mass airflow and pressure sensors need recalibration to account for changed conditions
Professional tuning is an essential part of any turbocharger installation or upgrade, not an optional extra. The cost of tuning should always be factored into your project budget.
Q3: How long does it take to install a Jrone turbocharger?
Installation time varies significantly based on several factors:
| Installation Type | Estimated Time | Factors Affecting Duration |
|---|---|---|
| Direct replacement (same model) | 4-6 hours | Accessibility, fastener condition, experience level |
| Upgrade on turbocharged engine | 6-10 hours | Supporting modifications, custom fabrication needs |
| New installation on non-turbo engine | 10-40+ hours | Extensive modifications, custom manifolds, ECU programming |
Professional installations may be completed more quickly due to experience and specialized tools, but complex installations involving custom work can take several days to complete properly.
Q4: What are the signs of a failing turbocharger?
Recognizing symptoms of turbocharger failure early can prevent more extensive engine damage. Common warning signs include:
- Loss of power: Noticeable decrease in acceleration and overall performance
- Excessive smoke: Blue smoke (oil burning) or black smoke (over-fueling) from exhaust
- Unusual noises: Whistling, whining, or grinding sounds from the turbocharger area
- Oil leaks: Visible oil around the turbocharger housing or in exhaust
- Check engine light: Often triggered by boost pressure irregularities or other sensor readings
- Increased oil consumption: Failing turbo seals can draw oil into the combustion chamber
If you notice any of these symptoms, have your vehicle inspected promptly by a qualified technician familiar with turbocharged systems.


 浙公网安备 33010002000092号
 浙B2-20120091-4